MFT Sketch Challenge 374
Pop-Up Birthday Card
Welcome!
I am excited to finally get to finish this card and get it posted. I really love this one. These little girls are adorable!
I started off the card by doing the front panel. I stamped the girl with the present from My Favorite Things "Happy Birthday To You" on a Nina Solar White 80 lb piece of cardstock, and also on a piece of Post It masking tape with Momento Tuxedo Black Ink.
I cut out the mask and put in over the panel and then I used a full heart stencil I created from the My Favorite Things "Full Of Heart" Die.

 I used Wilted Violet Distress Oxide ink to add color to the background. Then I used the My Favorite Things "Rectangle STAX Set 1 and 2" to create a frame for the panel in Purple cardstock. I set that aside.
I will cut another piece at 4 1/4" x 5 1/4" and score it a little more than 1/4" on both ends. This is the bottom of the inside of the pop-up part. Now I need a middle part. I will cut a piece at 5 1/4" x 3 3/4" and score it on the ends a little more than 1/4" just like the back part of the card. This is not a set size. It just needs to be 5 1/4" and big enough to create what you want to be on the. middle part of the pop-up.
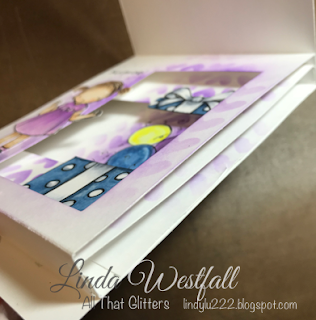
I stamped the present again and the girl from My Favorite Things "Cupcake Day" onto another piece of Nina Solar White Carstock without the cupcake in her hand. I colored everything with Copic Markers. I cut a rectangle out of the top and the middle layers of the pop-up parts. I used the stencil I made again on the top and middle pop-up parts. I used one of the pieces to stamp some balloons and used the stencil to add in behind the balloons.

I should have just stamped this on the back of the pop-up part of the card. And it wasn't until I was putting this together that I figured this out.
I had to take the balloon part off the back of the card base and adhere it to the back of the pop-up part instead.
I put adhesive on the front scored 1/2" part of the top pop-up piece. The bottom pop-up piece will have adhesive on both scored ends and the bottom of the back of that piece as shown below.
Then the middle layer of the pop-up will have adhesive on the outside of both of the scored ends.
Now to put it all together.
Start with the top of the pop-up, and take the adhesive off the top piece and place it inside the card base, snugged up to the crease. Now it should be adhered to the top of the card base. Now take the middle layer pop-up and take the adhesive off, and adhere it to the crease part of the card as well. Take the adhesive off the bottom middle layer and line up with bottom end of the top layer. Now take the bottom layer of the pop-up and it will overlap the middle layer at the crease of the card base. I added the balloons to the bottom where I wanted it to show and then adhered it to the inside of the top and middle parts of the pop-up, making sure it will close flat.
I added the cut apart present to the top and bottom of the middle layer of the pop-up and the Cupcake girl with some Distress Collage Medium Matte. I stamped the Surprise with Momento Tuxedo black ink and added some little lined around it. I shaded the area under the girl to give here some ground to stand on, so she wasn't just floating there. And finally adhered the back of the pop-up to the card base.
I stamped the "Happy Birthday to You" from the set in VersaMark ink and heat embossed it in black.
WOW! That was a lot of top, middle, bottom, and I hope it wasn't just a whole lot of mumbo-jumbo.
It was fun to create. If you want to play along, go to My Favorite Things Bog here.
#mftstamps
Thanks for visiting!


