Wednesday, November 22, 2017


Welcome!


One Stamp Used Three Ways.


This was fun to see the effects you can achieve with different mediums using the same images. Hope you enjoy.


For this card I stamped the images and heat embossed them with silver embossing powder. Then I used my Faber Castell Polychromos colored pencils to color in where I wanted color. Die cut a red and silver glitter paper out of the "merry" die. Glued together and glued to the card. Stamped the "Christmas" in silver embossing powder on black cardstock and cut and glued to the card. foam mounted the panel to a dark gray card and added some silver sequins.


This card was made by stamping the image in the opposite corners using black embossing powder. Then I watercolored the images with my Winsor and Newton watercolors. Added some dots with a versa mark pen and gold embossed those. Stamped the "wishing you" image in black ink. I black embossed some white cardstock and die cut the "joy" out of that black embossed paper that I created along with some gold glitter paper. Glued those together and adhered to my card panel. Foam mounted the panel to my red card base.


For the third card I started with stamping the image onto white cardstock. Made a mask for the image with post it roll mask, and distress inked the background. Then I used copic markers to color the images and added a little Wink of Stella and white jelly pen to accent the lighter areas. Outlined the images with a black marker, and stamped the "wishing you a" and "christmas" in black ink. Used some of the black embossed paper I created and red glitter paper to die cut the "merry" and glued those together and to the card panel. Cut a piece of scrap black cardstock to go behind the upper right corner and adhered to the white card.

Thanks for joining me!


Welcome!


Fun With Building A Scene.


I had some fun creating this card by using a cute jeep stamp that I had, and of course it had to be colored red. I used copic markers after coloring the background with distress inks. Added some snow with white pigment ink and a stamp and a jelly marker. I heat embossed some white cardstock with black embossing powder and the die cut the merry out of it. Then stamped the "Christmas" image, and glued the "merry" to the card. I colored some novo clear crystal drops with red dye ink and added with the end of a paint brush.

Thanks for joining me!


.

Tuesday, November 21, 2017

Welcome!


Watercolor Paper Comparison.

Today I decided that I would compare two different watercolor papers. One that is hot press and one that is cold press. The cold press has more texture to it.
I started out by embossing a background stamp onto both papers and heat embossing them. The cold press, with more texture was harder to get a good stamp, and therefore did not emboss fully. But despite that, it still was complete enough to look good. Then I watercolored both with Windsor and Newton watercolors. Both look good, but I think I like the hot press paper without as much texture better.

The cold press paper.

The hot press paper.

Really liked the way this stamp looks embossed with the watercolors over the top.

Thanks for joining me.


Saturday, November 11, 2017


Welcome!


I am adding several posts with photos because I have tried to do videos........still not happening. So just photos until I can learn. 


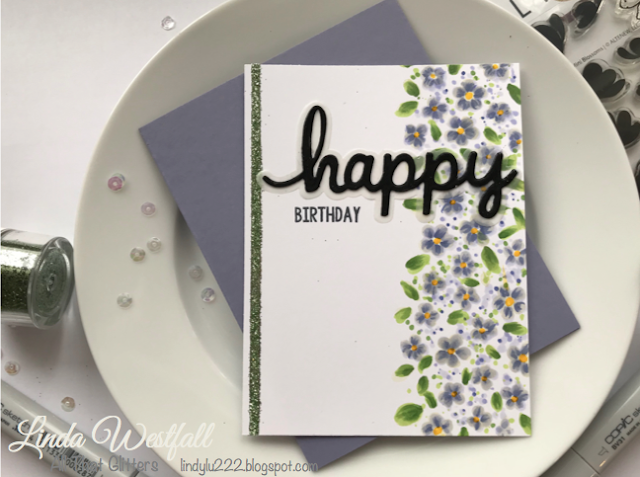
I created this card using the Mini Blossoms stamp set and no line coloring technique. It took several tries to create a panel that I was happy with. I used copic markers to fill in the flowers and added little dots around them. I used a yellow jelly pen to create the centers of the flowers. I added a piece of sticky strip and rubbed glitter on it. then embossed the Happy in black on velum and glued that to the card. and stamped the birthday in black Momento tuxedo black ink. 


Hope you all have a great day!


Welcome!


I have made a trio of watercolor cards. The first... I used distress inks to watercolor loosely filling the hydrangia. Then I used comic markers to create a shadow around some of the petals. I stamped three extra petals that I raised on top of the card with some foam squares. 


The next card I used the Christmas Rose stamp set. I used a no line coloring technique and a little more control to fill in these images with Winsor and Newton watercolors..


The final card I used the Modern Anemones stamp set, no line coloring teqnique, and used the Winsor and Newton watercolors again. But taking more time to try to crate more details with the watercolors.


Thanks for joining me!


Friday, November 10, 2017


Welcome!


I have tried to make a video work and I think all technology hates me!

I haven't realized how many different mediums that  I own that I can use to watercolor with. I will be posting many fun and different mediums you can watercolor with. And it has been fun to see how different all of these can look.

So here is a card I have created using Gansai Tanbi watercolors.
They create a very pigmented background. I started by stamping my snowflakes with versa mark ink and heat embossing them with white embossing powder. Then I watercolored the background. Next I heat embossed the Joy with silver embossing powder on velum paper. Cut it longer than my card panel and glued it around the back. Then I attached it to my white card base. And lastly, added some sequins.


Thanks for visiting.


Wednesday, November 1, 2017

Watercolor


Welcome!

Today, I was watching Kelly Latevola and her series "What Would Kelly Make." I have really enjoyed watching her YouTube videos, and loving the similarities to her style as to mine. I have been crafting for many years, and hope to post more consistently than I have in the past. I used some of her inspiration on the black and white striped background stamping.


The supplies I have used are;

  Simon Says Stamp—Wild Beauty
Waffle Flower -- Madern Play

Stampin’ Up!-- Brushstrokes
Memento-- Tuxedo Black Ink Pad
VersaFine—Onyx Black Ink Pad
Tim Holtz—Distress Ink Fossilized Amber
Tim Holtz—Distress Ink Mustard Seed
Tim Holtz—Distress Ink Squeezed Lemonade
Tim Holtz—Distress Ink Twisted Citron
Tim Holtz—Distress Ink Mowed Lawn
Tim Holtz—Distress Ink Salty Ocean
Tim Holtz—Distress Ink Chipped Saphire
Tim Holtz—Distress Ink Wilted Violet
Tim Holtz—Distress Ink Shaded Lilac
Tim Holtz—Distress Ink Seedless Preserves
Ranger—Perfect Pearls
Tim Holtz-- Stamp Platform
Post It- 2” Masking Tape
Canson-- Watercolor Paper
Stampin" Up! -- Melon Mambo Cardstock
Stampin" Up! -- Rich Razzleberry Cardstock
GellyRoll White gel Pen
EK Success-- Writing Pen
Zig Wink Of Stella—Clear

There was some trial and error that went along with creating these. If I ever figure out how to do the video, I will add that to this post as well.

Thanks for stopping by!


adding pinterest script 3. Changing the Position of the Pin it! button The cool thing about this code is that you have some freedom over where the Pinterest button for Blogger will go over the image. Take a look at the code that you just copied and pasted into the HTML for the word 'center'.