ALTENEW MARCH 2022 WHIMSICAL FAIRY TALE RELEASE BLOG HOP + GIVEAWAY

Hi there! Welcome to Altenew Whimsical Fairy Tale Blog Hop! You should have arrived here from Nathalie's blog and your next stop is Virginia Lu's.
You can also check out the blog list on the Altenew's Card Blog.
Check out all the amazing products from this release here.
I think the 3D Embossing Folders are quickly becoming one of my favorite products. And I have a couple of examples of how you could use them, But first I am going to show how I used the Double Rainbow Stencil.

I debated if I wanted to use this in a more traditional way, or some other way, and I landed on the latter. I began by taping my stencil to a Neenah solar white panel and blended Permanent Black ink partway down the stencil.

When that ws dry, I splattered Ruby Red, Orange Cream, Maple Yellow, Just Green, Tide Blue, and Ultraviolet inks down the card. Then I stamped the sentiment from Paint-A-Flower: Zinnia Magellan Rose stamp set with Permanent Black ink.


I used enamel dots from Red, Cosmos, Pocketful Of Sunshine, Essential Black, White, and Green Fields sets and placed them on the card and adhered the panel to a yellow card base.
For my next two cards I have used the Flower Bed 3D Embossing Folder. I absolutely love this folder.

I began by running the embossing folder through my die cutting machine with some tan cardstock and then rubbing some white pigment ink to the top of the raised areas. I wanted a little more depth, so I inked up the smoother side of the embossing folder with some Mocha ink and ran it back through the die cutting machine again.

I stamped the "happy" on some velum and wrapped that around to the back and taped it down. I cut the "birthday" from All About Wishes Die set once from gold mirror cardstock and then two more times from white cardstock. Adhered them together with the 2 in 1 Precision Glue Pen.

I adhered a thin strip of shimmery dark brown cardstock under the velum and then adhered the "birthday" to the top of the velum. I thought the flower centers needed something still, and added some Citrus Burst with the smallest Detailed Blending Brush.
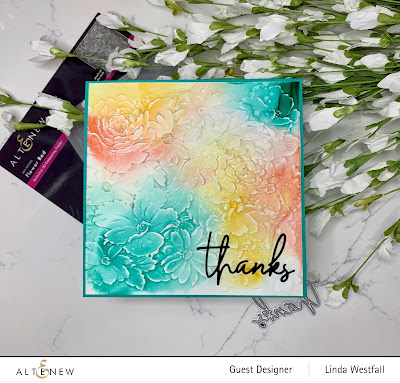
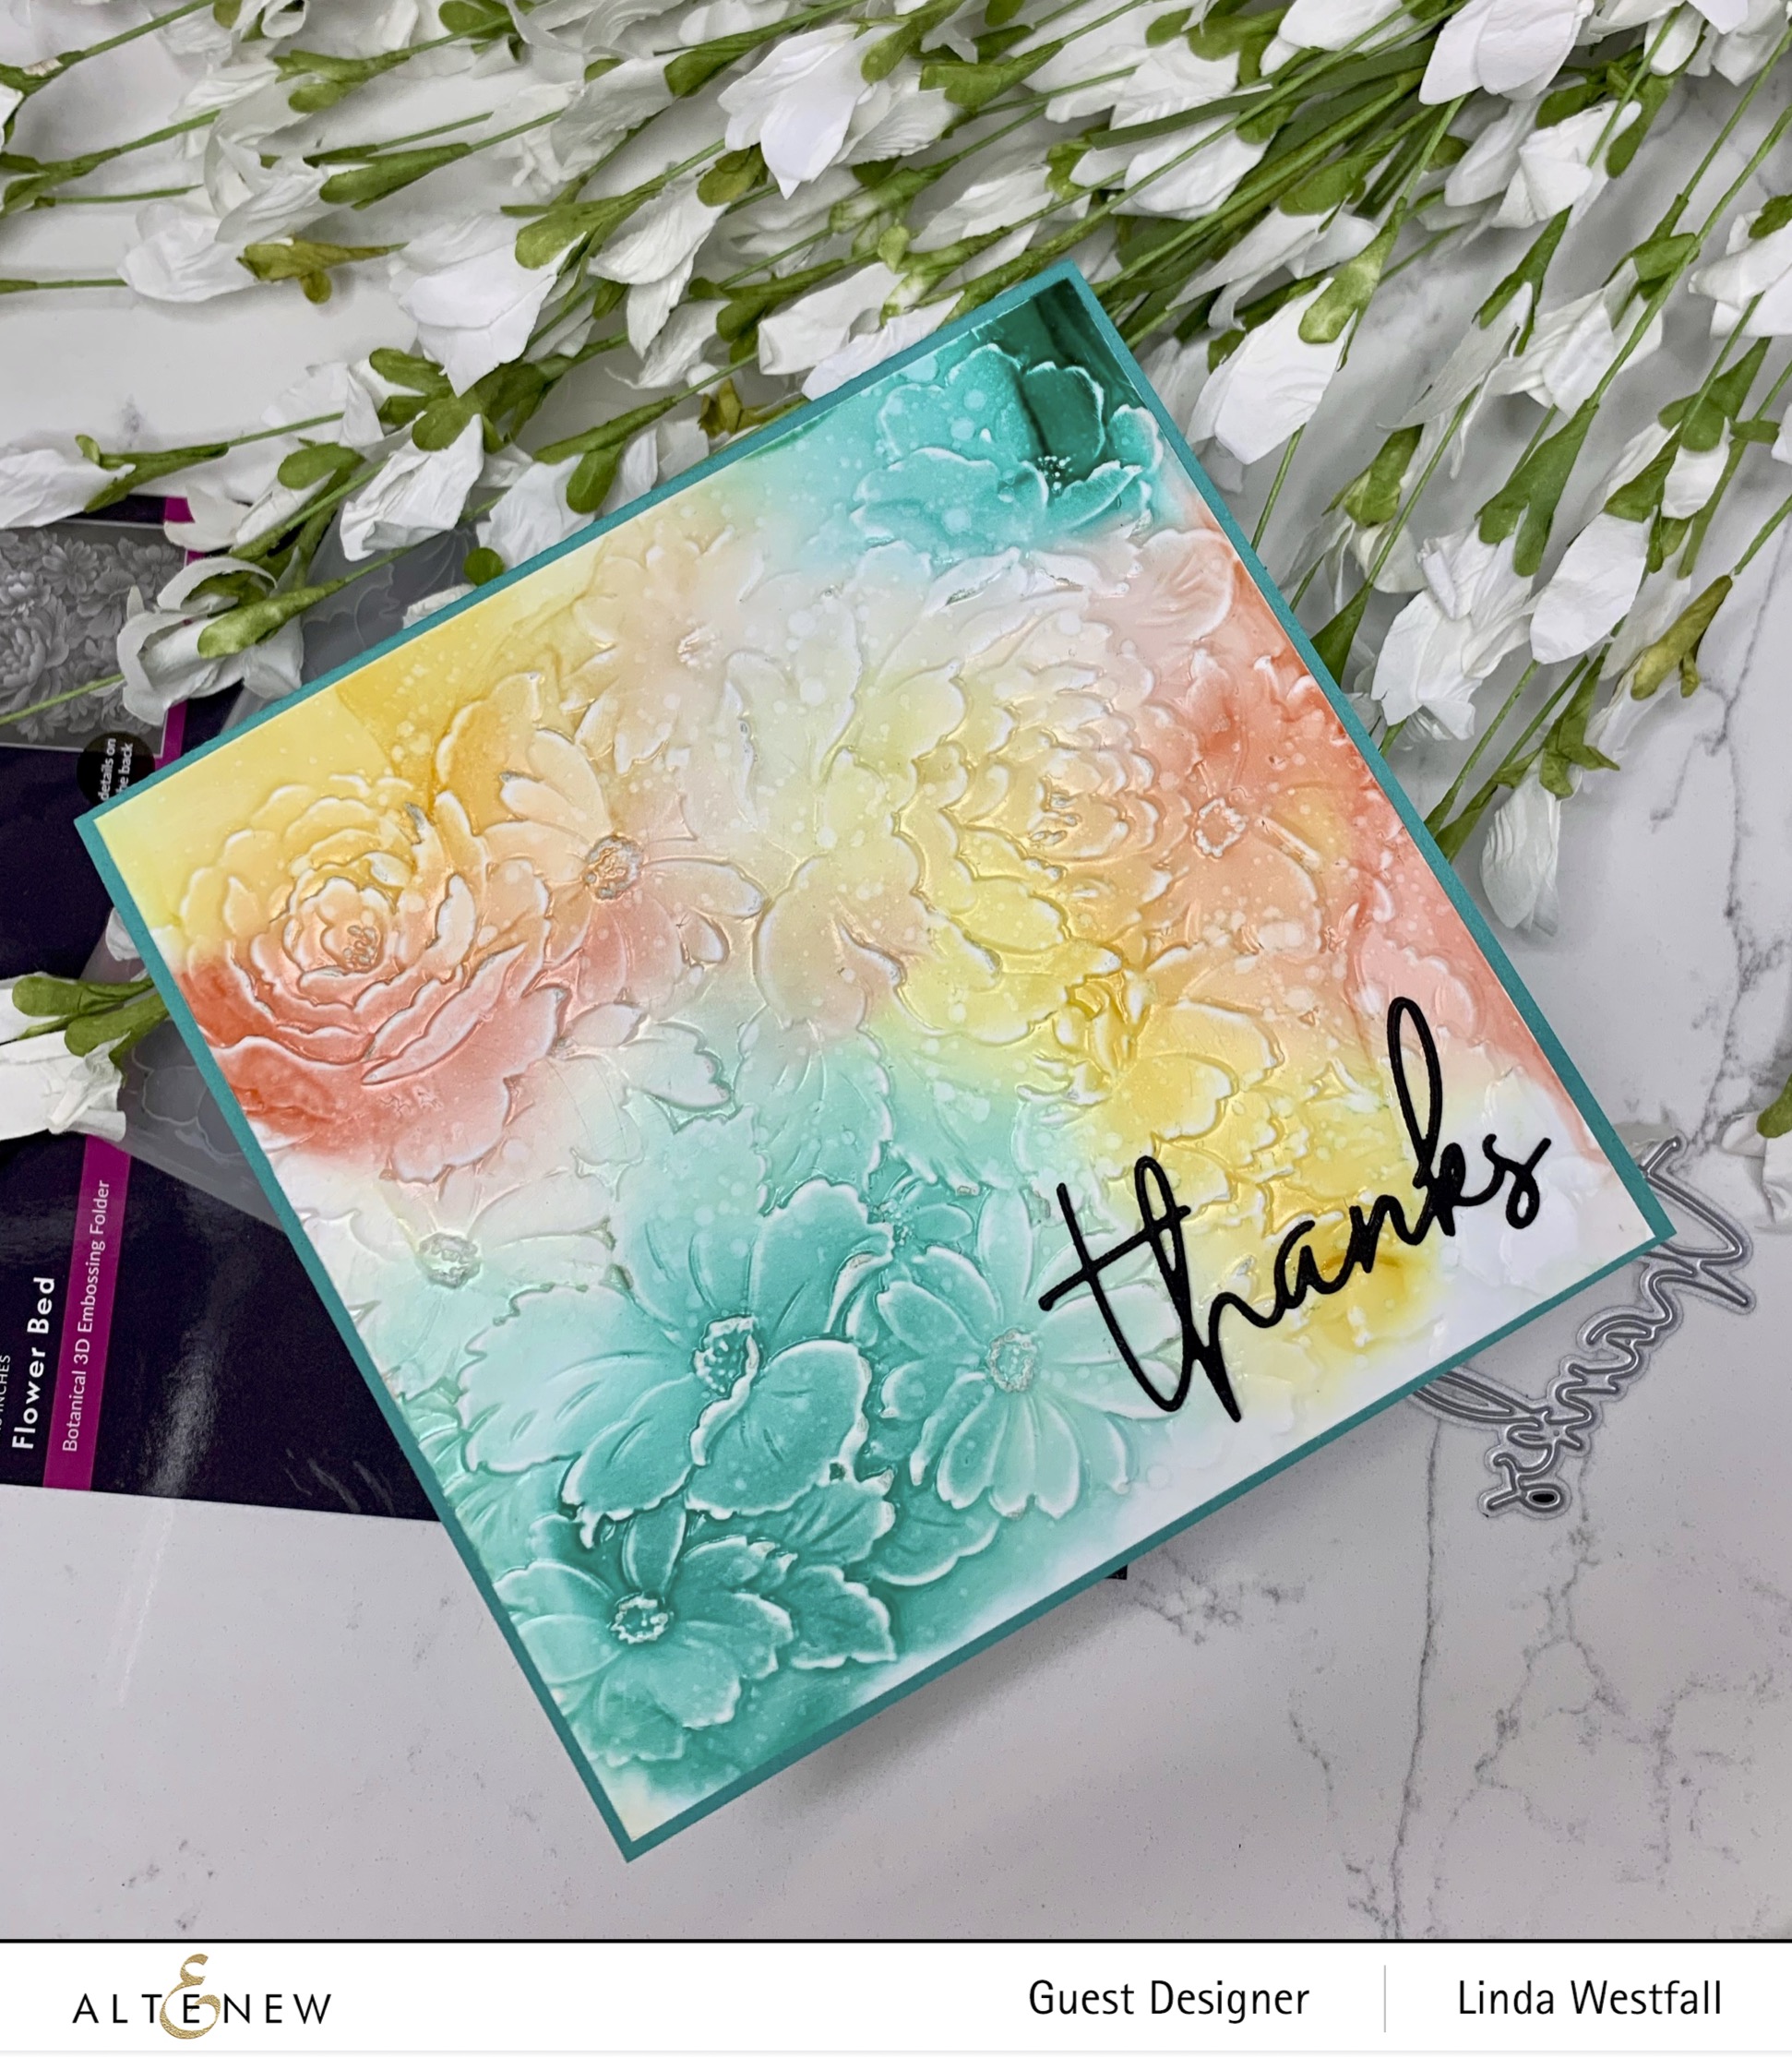
For the second card using the Flower Bed 3D Embossing Folder, I first created a background panel using the alcohol inks and photo paper with Rouge, Buttercream, and Volcano Lake inks. Waited for it to dry and then ran it through the die cutting machine with the 3D embossing folder.

I took a fingernail buffer and rubbed it over the top of the raised embossed paper. Cut the "thanks" from the Craft Your Life Project Kit: Seasonal Blooms three times out of black cardstock and adhered them together and then to the panel. Finally adhered the panel to a teal card base.

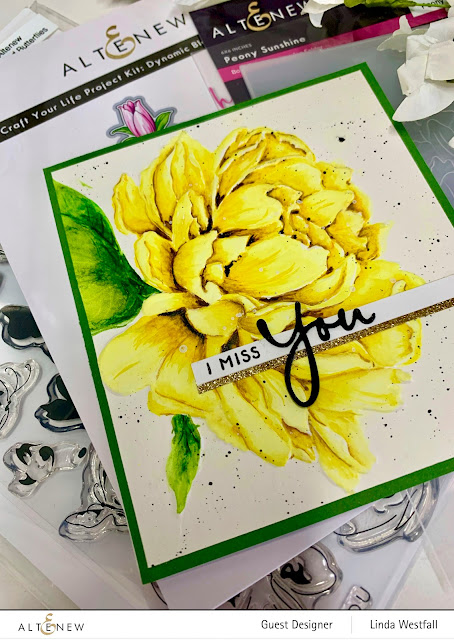
For the last card I am sharing, I used the Peony Sunshine 3D Embossing Folder with watercolor paper, and ran it through the die cutting machine. I am not very good at watercoloring, but using the 3D embossing folder made it a lot easier. I painted the flower with the 24 Pan Watercolor Set.

I stamped the "I miss" from the Painted Butterflies stamp set onto a piece of white cardstock, and layered a strip of the Gilded Glitter Cardstock underneath and adhered that to the panel.

I cut the "you" from the Craft Your Life Project Kit: Dynamic Blossoms three times from black cardstock and adhered them together with the 2 in 1 Precision Glue Pen. Finally, adhered the panel to a green card base.
Thanks for joining in the hop.Make Today Amazing!
GIVEAWAY
$300 in total prizes! To celebrate this release, Altenew is giving away a $50 gift certificate to 2 lucky winners and a $25 gift certificate to 8 winners! Please leave a comment on the Altenew Card Blog and/or each designer’s blog post on the blog hop list below by 03/31/2022 for a chance to win.
Altenew will draw 10 random winners from the comments left on each stop of this blog hop and announce the winners on the Altenew Winners Page on 04/02/2022.


For the last card I am sharing, I used the Peony Sunshine 3D Embossing Folder with watercolor paper, and ran it through the die cutting machine. I am not very good at watercoloring, but using the 3D embossing folder made it a lot easier. I painted the flower with the 24 Pan Watercolor Set.

I stamped the "I miss" from the Painted Butterflies stamp set onto a piece of white cardstock, and layered a strip of the Gilded Glitter Cardstock underneath and adhered that to the panel.

I cut the "you" from the Craft Your Life Project Kit: Dynamic Blossoms three times from black cardstock and adhered them together with the 2 in 1 Precision Glue Pen. Finally, adhered the panel to a green card base.

Thanks for joining in the hop.

GIVEAWAY
$300 in total prizes! To celebrate this release, Altenew is giving away a $50 gift certificate to 2 lucky winners and a $25 gift certificate to 8 winners! Please leave a comment on the Altenew Card Blog and/or each designer’s blog post on the blog hop list below by 03/31/2022 for a chance to win.
Altenew will draw 10 random winners from the comments left on each stop of this blog hop and announce the winners on the Altenew Winners Page on 04/02/2022.
Love the black rainbow going
ReplyDeleteinto the colorful clouds.
The birthday card is gorgeous.
thanks for sharing
txmlhl(at)yahoo(dot)com
Such beautiful cards! I love the black/gray rainbow with the colorful splatters card, so unique!
ReplyDeleteVery, very nice! My favorite is the 'Thanks' card with the alcohol inks. Stunning.
ReplyDeleteGorgeous cards! I love the one using the flower garden embossing folder.
ReplyDeleteI LOVE the textures and designs!
ReplyDeleteWow, gorgeous designs!
ReplyDeletethe Thanks card is so gorgeous and colorful!!
ReplyDeleteVery striking cards. Love that peony
ReplyDeleteMarisela Delgado said: So beautiful! mariandmonsterd@yahoo.com
ReplyDeleteAmazing cards!! So creative!
ReplyDeleteYour Flower bed birthday card is great!
ReplyDeleteFor somebody who says they're not very good at watercoloring, you sure did make that peony beautiful!
Your cards are marvelous!
Just love the different take on the rainbow. Nicely done.
ReplyDeleteI absolutely love these cards.
ReplyDeleteWonderfully designed cards that are SO inspiring.
ReplyDeleteJust love the tan card! So elegant.
ReplyDeleteYour cards look stunning. Great job.
ReplyDeleteLove the textures!
ReplyDeleteLove the tan happy birthday card!
ReplyDeleteLiv the tan with the white pigment ink highlights
ReplyDeleteLovely cards!
ReplyDeleteI like your creative and pretty cards.
ReplyDeleteVery pretty flower cards. Great ideas.
ReplyDeleteThanks for showing different looks with the same embossing folder. Love the fancy birthday card.
ReplyDeleteLove your second card the best with the tan cardstock. Unusual color for a card but it works! Thanks for sharing.
ReplyDeleteYour embossed cards are lovely and so inspiring! GORGEOUS work!
ReplyDeleteThe white ink on the kraft cardstock is so pretty!
ReplyDeleteFor not being very good with watercolors you did an amazing job on this peony, it is so BEAUTIFILL!
ReplyDeleteLove all your gorgeous cards! Thanks for sharing.
ReplyDelete