ALTENEW: JUNE 2022 MINI STAMPS WITH PURCHASE (Sneak Peak)
Hello,
I have a little sneak peak of some upcoming free sets in the month of June. They will be available for sale following their free debut. I just love the mini sets, but I am guilty of not pulling them out near enough. These are not in any order.
First up- products used are:
Blooming Bundle Stamp Set
Blooming Bundle Die
Diamond Frame Cover Die
Artist Marker Island Garden/ Set H
Artist Marker Sunshine Valley Garden/ Set F
Icy Water Crisp Dye Ink
Small Blending Brush
Permanent Black Ink
Obsidian Black Ink
Instant Dimension Foam Tape
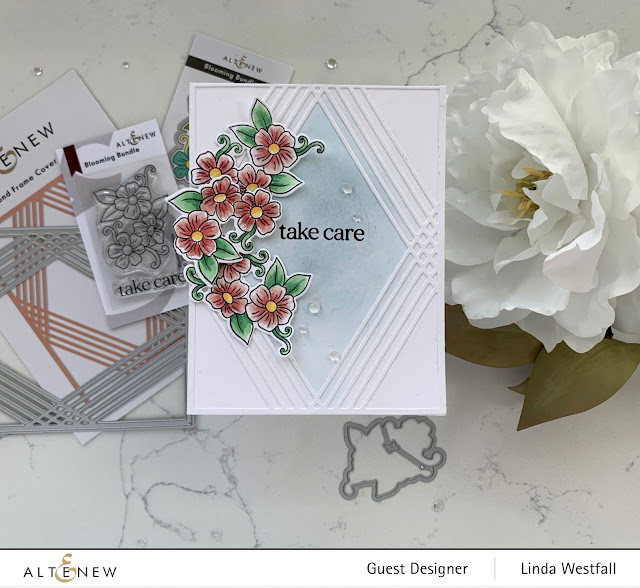
I stamped the flowers with the Permanent Black Ink and colored them in with the Artist Markers, then die cut them out. I cut the Diamond Cover Die out. Ink blended the center of a white card base with the Icy Water ink, and stamped the sentiment. Adhered the Diamond Frame and then the flowers, adding Foam tape to the center flowers. And added a couple water droplet little things (found in my stash- do not know the name). (Free with Purchase Now)
Next one- products used are:
Bold Floral Stamp Set
Bold Floral Die
Brick Rosette Builder Stencil Set
Tropical Leaf Mix Dies
Leaf Mix Dies
Permanent Black Ink
Northern Shores Crisp Dye Inks
Green Fields Crisp Dye Inks
Pocketful Of Sunshine Crisp Dye Inks
Pure White Embossing Powder
Bold Floral Die
Brick Rosette Builder Stencil Set
Tropical Leaf Mix Dies
Leaf Mix Dies
Permanent Black Ink
Northern Shores Crisp Dye Inks
Green Fields Crisp Dye Inks
Pocketful Of Sunshine Crisp Dye Inks
Pure White Embossing Powder
Embossing Ink
Small Blending Brush
Small Blending Brush
Instant Dimension Foam Tape
I stamped the flower with the Permanent Black Ink and colored it in watercolor style (very little water) with a paintbrush and the crisp dye inks smashed onto a craft mat. Used the Die to cut it out and cut the leaf dies out of some white cardstock as well. I blended the Northern Shore Inks through the Rosette Stencils onto another piece of cardstock. Adhered the rosette panel and another panel with Winter Lake applied to the outer edges underneath to a white card base. Adhered the die cut leaves and the colored flower to the card. Stamped and embossed the sentiment onto a strip of black cardstock and adhered it to the card with some Instant Dimension Foam Tape.

Cupped Flower Stamp Set
Classy Stripes Stencil
Woodless Coloring Pencils
Orange Cream Crisp Dye Ink
Warm Sunshine Crisp Dye Ink
Heart Beat Crisp Dye Ink
Aqualicious Crisp Dye Ink
Lavender Fields Crisp Dye Ink
Permanent Black Crisp Dye Ink
Mini Blending Brushes
Obsidian Black Ink
Fine Liner Pen Set
I stamped a panel all over with the flower in Permanent Black Ink and colored them in with the Colored Pencils. Blended the inks through the stencil on another piece of cardstock with the Mini Blending Brushes. Cut the two panels in an angle and adhered them to a white card base. Stamped the sentiment in the Obsidian Black ink and adhered it along with a black strip underneath it that was slightly wider. Finally, I drew a line around the panels on the card with a Fine Liner Pen.
I hope you have enjoyed the sneak peaks, and look forward to the free sets when they become available.
Make Today Amazing!


No comments:
Post a Comment