Tuesday, May 31, 2022

ALTENEW: JUNE 2022 MINI STAMPS WITH PURCHASE (Sneak Peak)

Hello,

I have a little sneak peak of some upcoming free sets in the month of June. They will be available for sale following their free debut. I just love the mini sets, but I am guilty of not pulling them out near enough. These are not in any order. 

First up- products used are:

Blooming Bundle Stamp Set
Blooming Bundle Die 
Diamond Frame Cover Die
Artist Marker Island Garden/ Set H
Artist Marker Sunshine Valley Garden/ Set F
Icy Water Crisp Dye Ink
Small Blending Brush
Permanent Black Ink
Obsidian Black Ink
Instant Dimension Foam Tape

I stamped the flowers with the Permanent Black Ink and colored them in with the Artist Markers, then die cut them out. I cut the Diamond Cover Die out. Ink blended the center of a white card base with the Icy Water ink, and stamped the sentiment. Adhered the Diamond Frame and then the flowers, adding Foam tape to the center flowers. And added a couple water droplet little things (found in my stash- do not know the name).                                                        (Free with Purchase Now)


Next one- products used are:

Bold Floral Stamp Set
Bold Floral Die 
Brick Rosette Builder Stencil Set
Tropical Leaf Mix Dies
Leaf Mix Dies
Permanent Black Ink
Northern Shores Crisp Dye Inks
Green Fields Crisp Dye Inks
Pocketful Of Sunshine Crisp Dye Inks
Pure White Embossing Powder
Embossing Ink
Small Blending Brush
Instant Dimension Foam Tape

I stamped the flower with the Permanent Black Ink and colored it in watercolor style (very little water) with a paintbrush and the crisp dye inks smashed onto a craft mat. Used the Die to cut it out and cut the leaf dies out of some white cardstock as well. I blended the Northern Shore Inks through the Rosette Stencils onto another piece of cardstock. Adhered the rosette panel and another panel with Winter Lake applied to the outer edges underneath to a white card base. Adhered the die cut leaves and the colored flower to the card. Stamped and embossed the sentiment onto a strip of black cardstock and adhered it to the card with some Instant Dimension Foam Tape.


Last up- products used are:

Cupped Flower Stamp Set
Classy Stripes Stencil
Woodless Coloring Pencils
Orange Cream Crisp Dye Ink
Warm Sunshine Crisp Dye Ink
Heart Beat Crisp Dye Ink
Aqualicious Crisp Dye Ink
Lavender Fields Crisp Dye Ink
Permanent Black Crisp Dye Ink
Mini Blending Brushes
Obsidian Black Ink
Fine Liner Pen Set

I stamped a panel all over with the flower in Permanent Black Ink and colored them in with the Colored Pencils. Blended the inks through the stencil on another piece of cardstock with the Mini Blending Brushes. Cut the two panels in an angle and adhered them to a white card base. Stamped the sentiment in the Obsidian Black ink and adhered it along with a black strip underneath it that was slightly wider. Finally, I drew a line around the panels on the card with a Fine Liner Pen.


I hope you have enjoyed the sneak peaks, and look forward to the free sets when they become available.

Make Today Amazing!

Monday, May 23, 2022

ALTENEW: MAY 2022 LOVELY IN LACE COLLECTION RELEASE BLOG HOP + GIVEAWAY ($300 in total prizes)


Hi and Welcome!

What a beautiful release. You can find all the beautiful products HERE.
Hope you are enjoying seeing all the fun ideas that have been shared.

Products used for the first card are:  

Vintage Lace 3D Embossing Folder 
Vintage Lace Simple Coloring Stencil Set
Buttercream Crisp Dye Ink
Fresh Lemon Crisp Dye Ink
Sand Dunes Crisp Dye Ink
Polar Bear Crisp Dye Ink
Winter Lake Crisp Dye Ink
Forest Glades Crisp Dye Ink
Permanent Black Crisp Dye Ink
Mini Blending Brushes
Instant dimension Foam tape
I ran the embossing folder through my die cutting machine with white cardstock- colored the raised flower and leaves with the inks and the brushes- colored the edge of a white notecard with the same inks, as well as another scrap piece of cardstock- colored the sentiment with the stencil on the colored scrap- cut and adhered the panel and sentiment to the card base.


Products used for the second card are:   

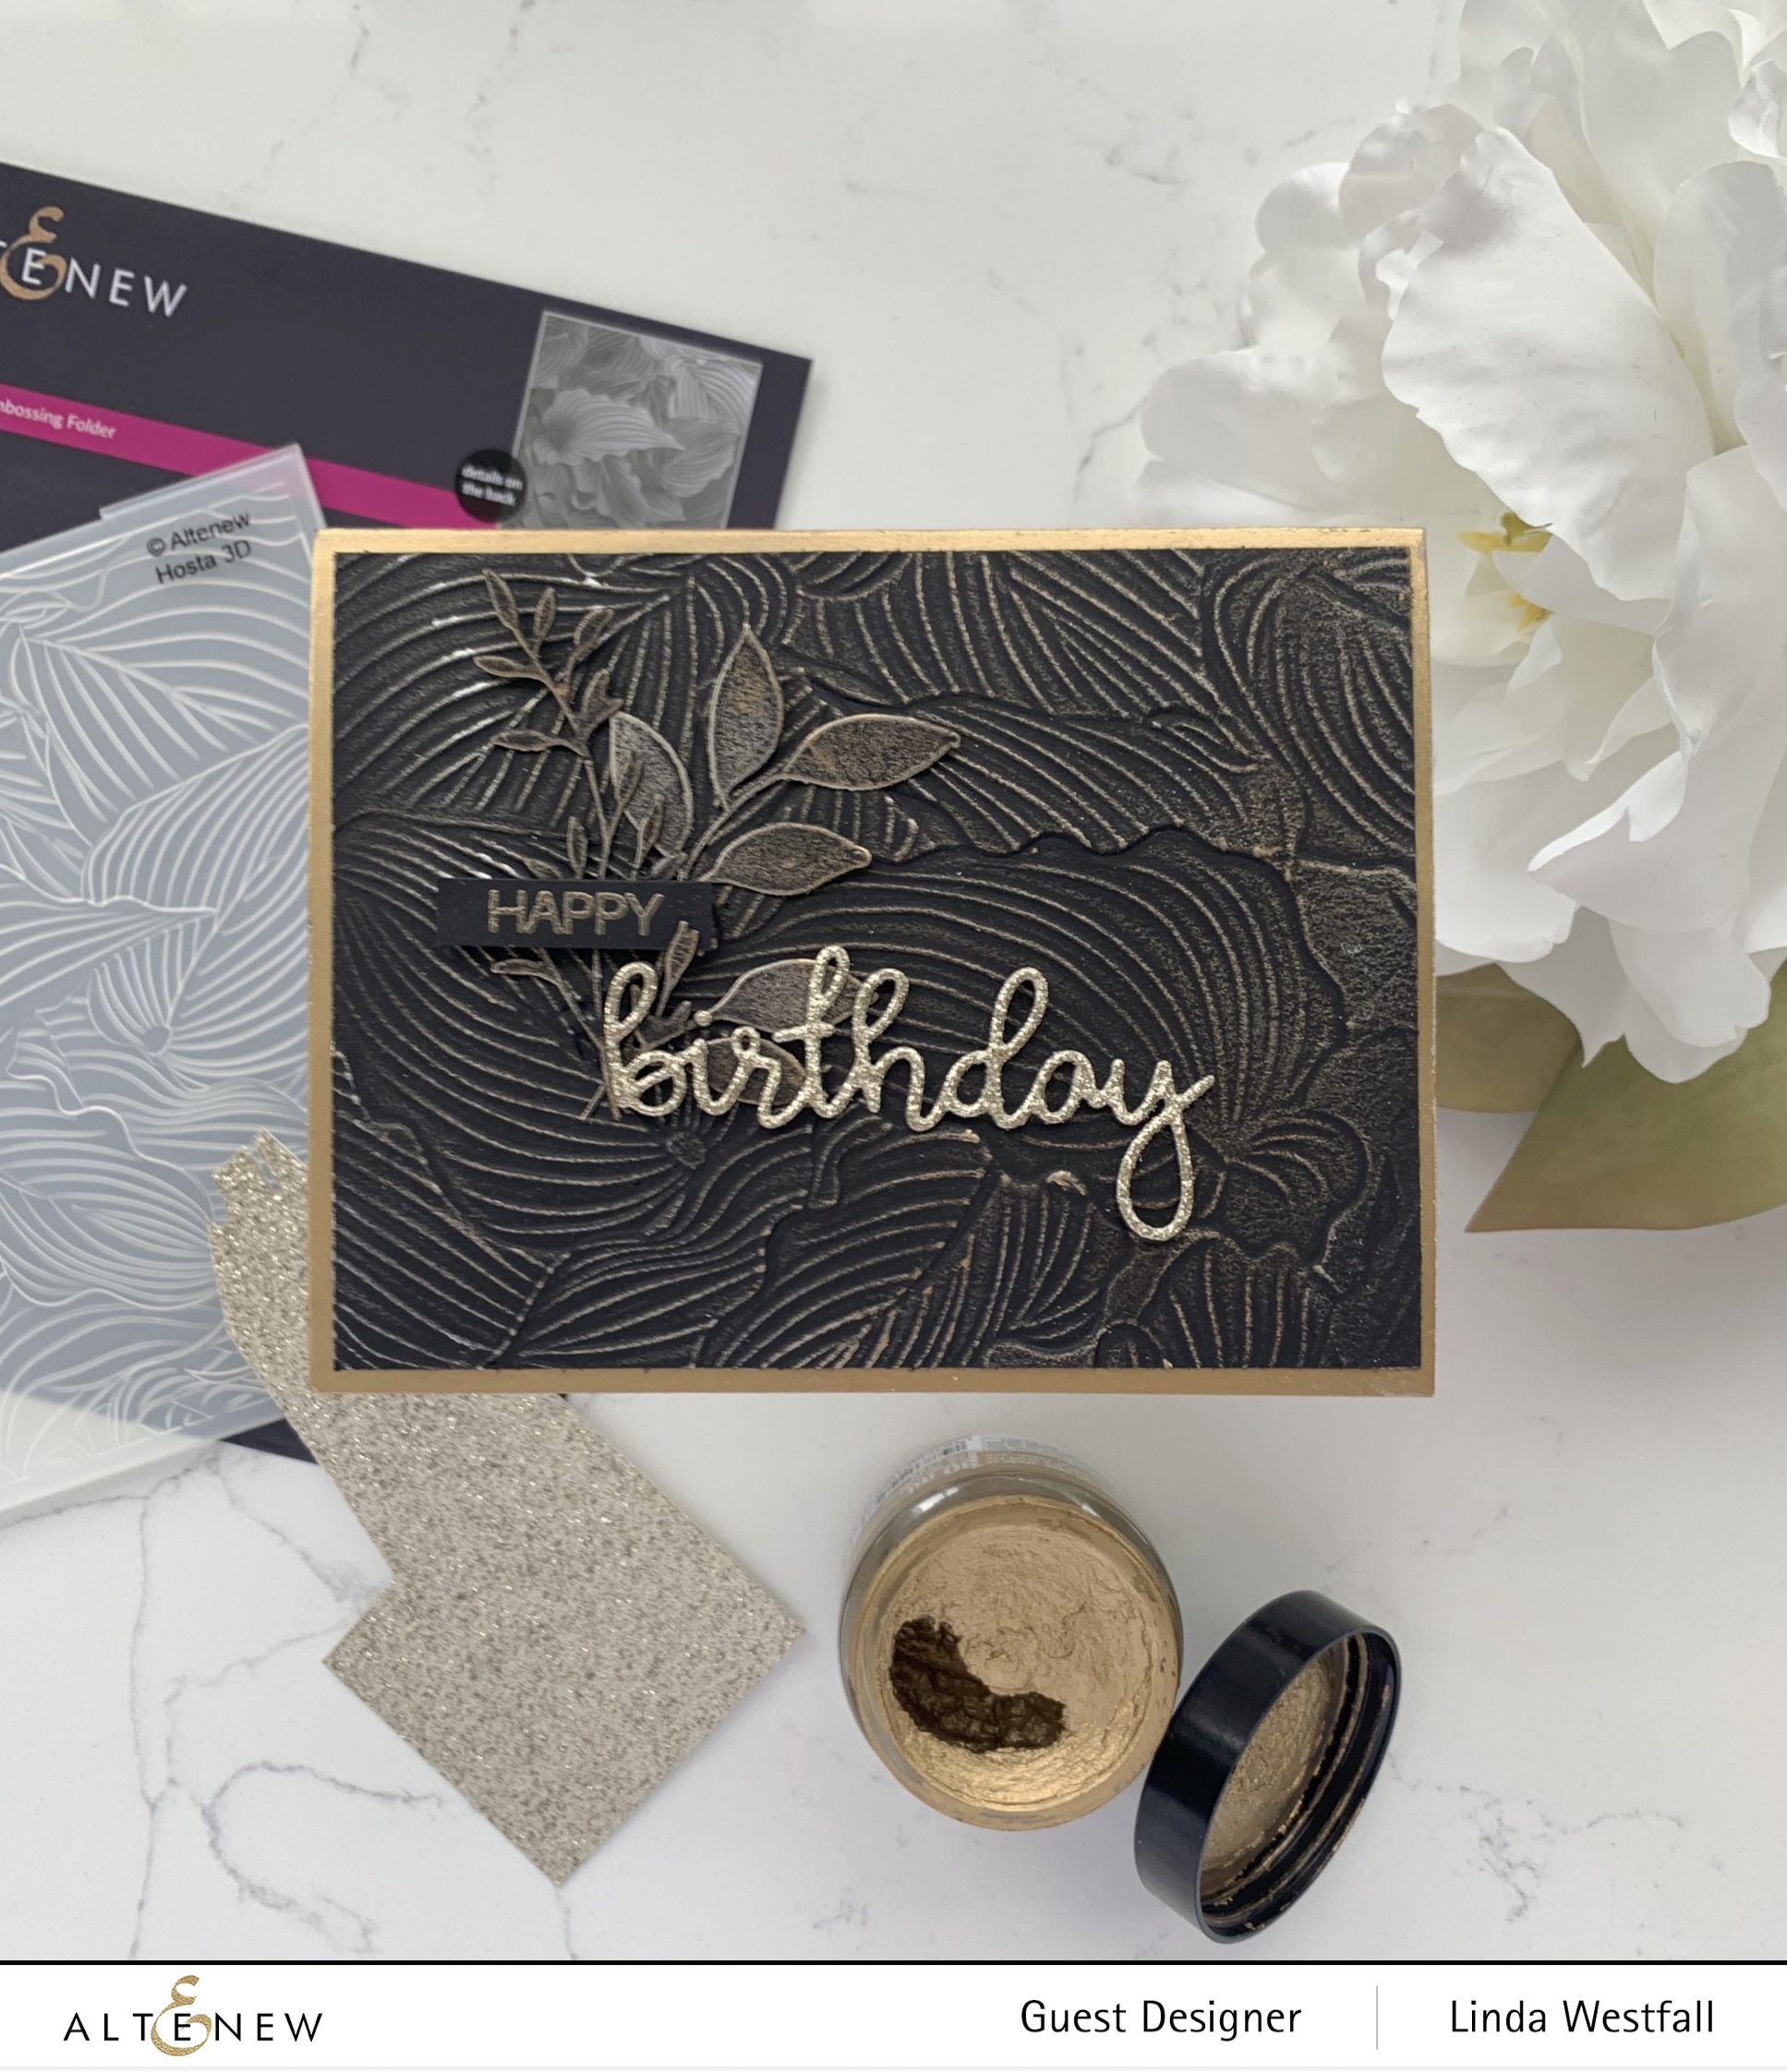
Hosta 3D Embossing Folder
Birthday Greetings Stamp Set
All About Wishes Die Set
Itty Bitty Branches Die Set
Gilded Glitter Cardstock
Antique Gold Embossing Powder
Gilding Wax


I ran the embossing folder through my die cutting machine with black cardstock- rubbed the gilding wax onto the raised parts of the embossed panel- die cut the leaves and rubbed the gilding wax onto them- die cut the birthday twice from black cardstock and once from the glitter cardstock- heat embossed the sentiment onto a strip of cardstock-rubbed the gilding wax onto a white card base- adhered everything to the card base.


Products used for the third card are:

Mariposa 3D Embossing Folder
Birthday Greetings Stamp Set
Woodless Colored Pencils
Obsidian Black Ink
Gamsol
Wink Of Stella Glitter Pen
Satin Gold Sequins
Fine Liner Pen Set
I ran the embossing folder through my die cutting machine with white cardstock- colored the raised portion with the colored pencils and blended them with gambol- filled in the inside parts and the butterfly body with the glitter pen- stamped the sentiment- filled in the sentiment where it went over the rough surface of the embossed image with a fine liner pen- added some sequins and adhered it to a white card base.


Products for the fourth and final card are: 

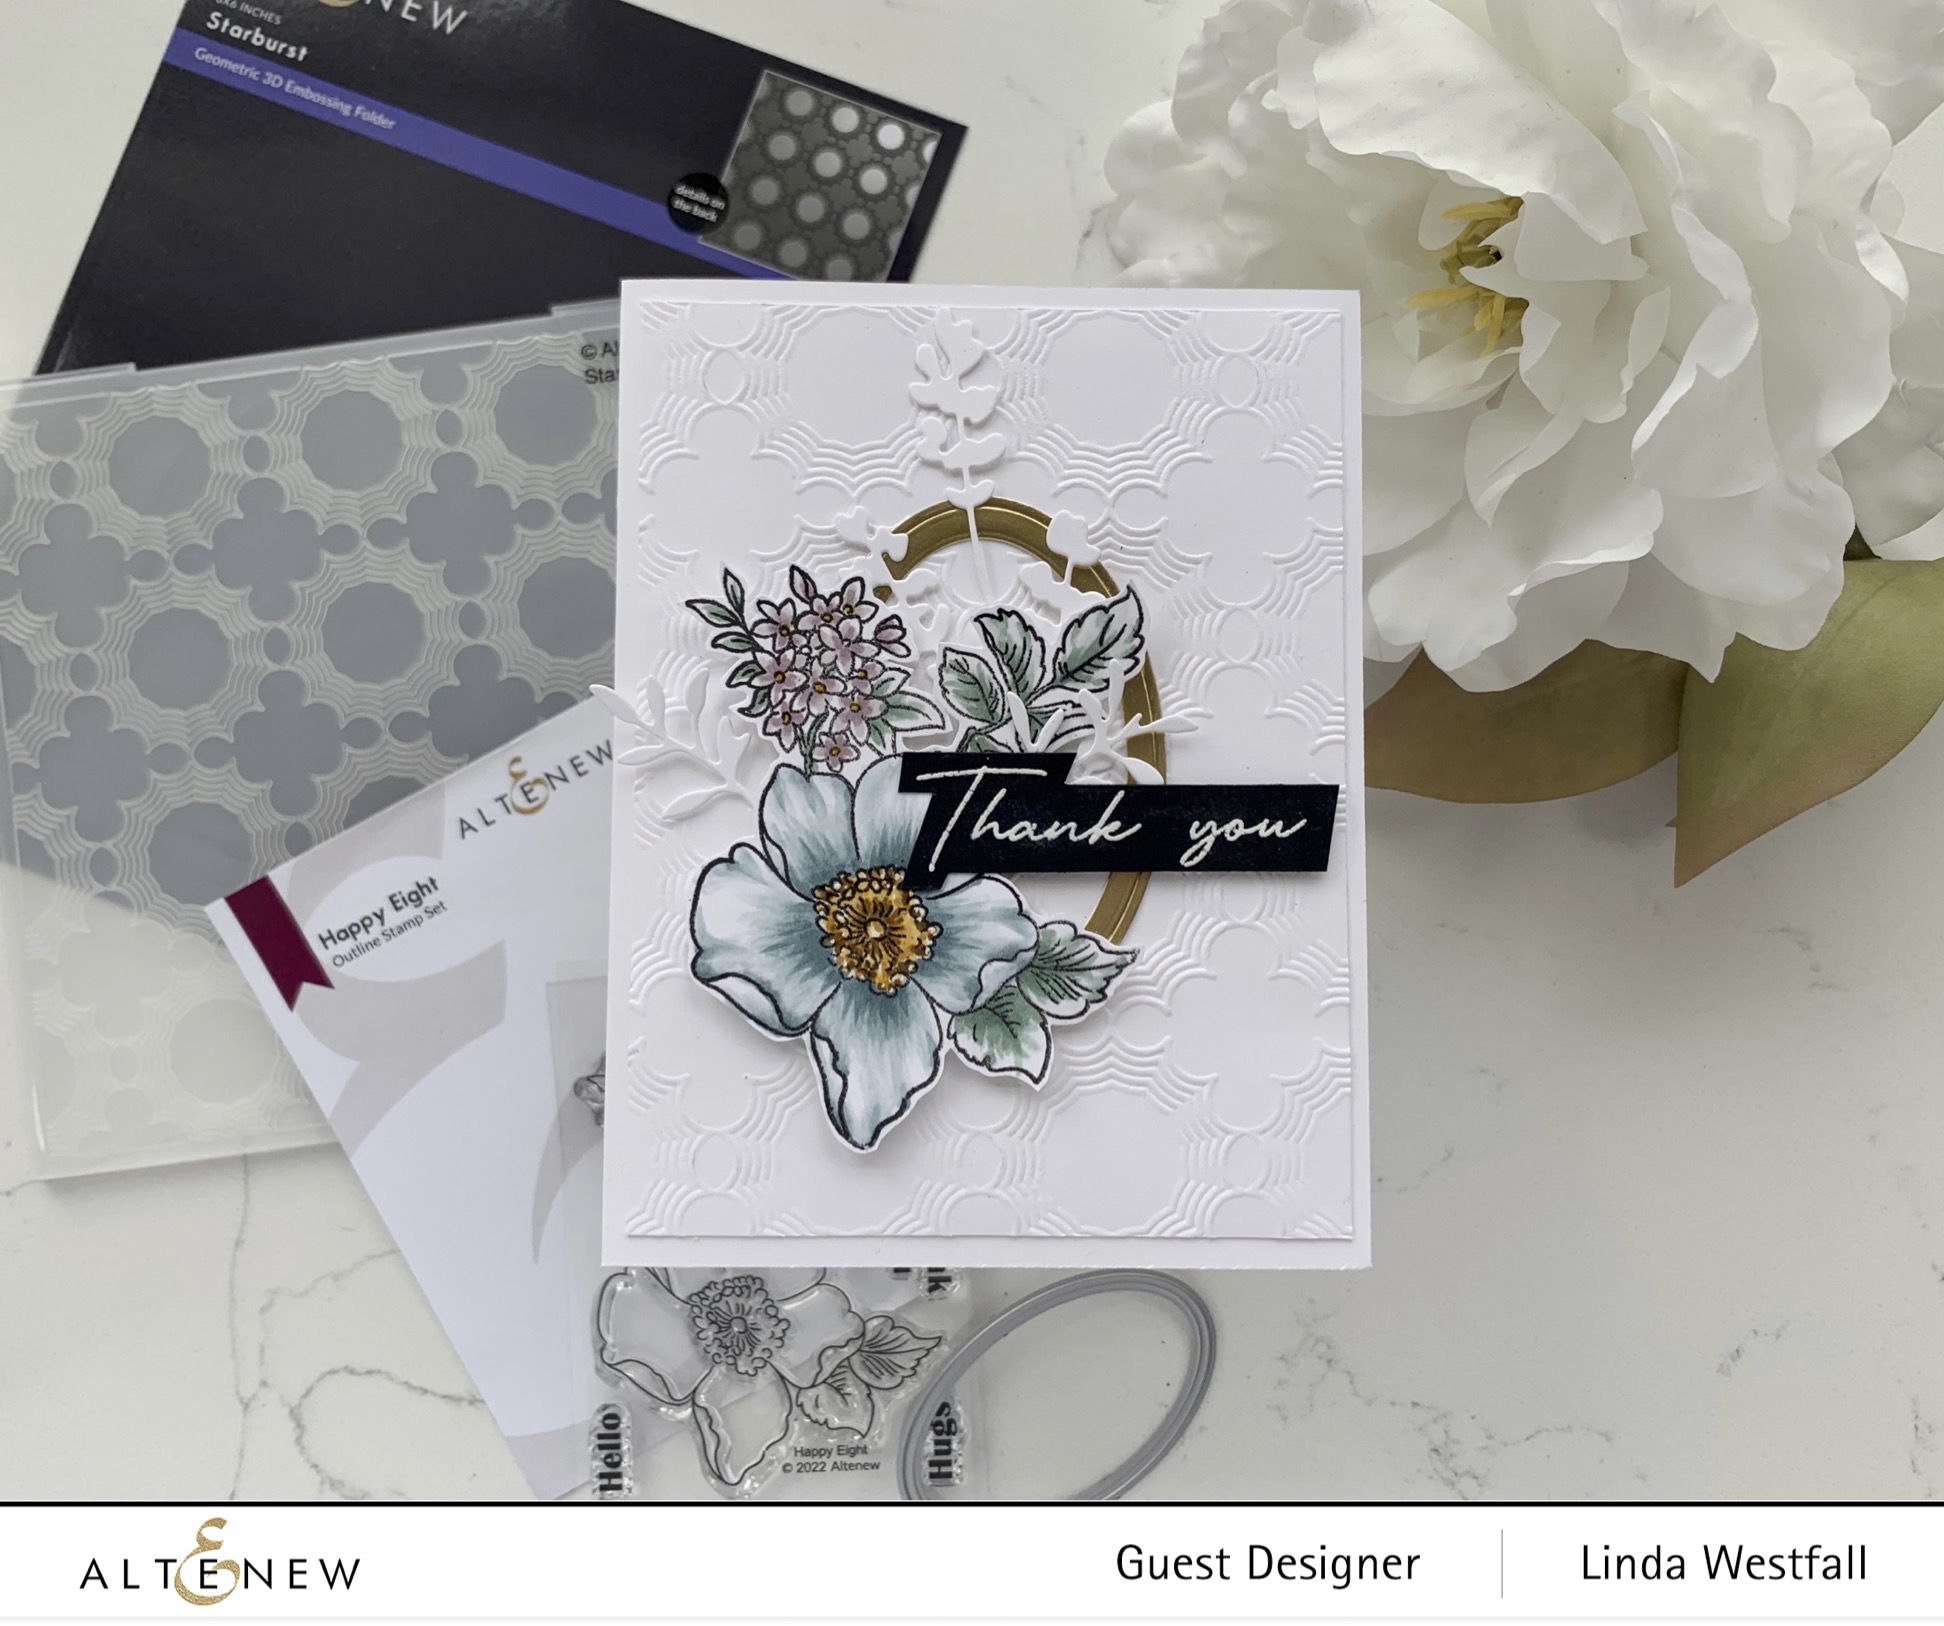
Starburst 3D Embossing Folder
Craft Your Life Project Kit: Florescence 
Nesting Oval Die Set 
Itty Bitty Branches Die Set 
Permanent Black Ink 
Space Garden Artist Markers Set I
Pure White Embossing Powder
Gold mirror cardstock
Happy Eight Stamp Set
I ran the embossing folder through my die cutting machine with white cardstock- die cut an oval frame out of the gold cardstock- die cut the branches from white cardstock- stamped and colored the floral image with the artist markers- heat embossed my sentiment onto a scrap of black cardstock- adhered everything to a white card base.


Thanks For Visiting.
Make Today Amazing!

Blog Hop Info:
Previous blog- Reiko Tsuchida
Up next- Bridget Casey

GIVEAWAY

$300 in total prizes! To celebrate this release, Altenew is giving away a $50 gift certificate to 2 lucky winners and a $25 gift certificate to 8 winners! Please leave a comment on the Altenew Card Blog and/or each designer’s blog post on the blog hop list below by 05/29/2022 for a chance to win. 

Altenew will draw 10 random winners from the comments left on each stop of this blog hop and announce the winners on the Altenew Winners Page on 05/31/2022.


**The Happy Eight Stamp Set was sent to me because I am a customer, hope you received yours for being a customer as well.

Sunday, May 22, 2022

 ALTENEW: PAINT-A-FLOWER MAGNOLIA RUSTICA RUBRA OUTLINE STAMP SET RELEASE BLOG HOP + GIVEAWAY                             ($200 in total prizes)


Hi, and Welcome!

Love this Paint-A-Flower: Magnolia Rustica Rubra set. I used the Artist Markers to fill in the blooms after stamping them in Permanent Black Ink on a panel of Neenah white cardstock. The colors used are: R502, R504, C003, Y514, Y608, Y817, C004, Y106, Y316, G503, G515, G425, and TG03. Then used the TG07 Artist Marker to fill in the background.


I used the Mighty Alphabet Dies to cut the "Mom" from the panel. Used Instant Dimmension Foam Tape to adhere the panel to a white card base and glued the letters down flat to the card.


I stamped the sentiment from the Craft Your Life Project Kit: Seasonal Blooms onto a strip of cardstock with Obsidian Black Ink and adhered it to the card.


Thanks for visiting and hope you have enjoyed the hop.
Make Today Amazing!

Previous blog= Bridget Casey.

Next blog= Rosie Neustaedter.

Beginning of the hop= Altenew Card Blog.


There is a monthly subscription plan for our Paint-A-Flower. When signed up, you are guaranteed a spot in the monthly Paint-A-Flower releases and will receive a set each month - at a specially discounted price! ($15.99 →$12.99)

Paint-A-Flower Monthly Subscription Plan Link.

GIVEAWAY

$200 in total prizes! To celebrate this release, Altenew is giving away a $50 gift certificate to 2 lucky winners and a $20 gift certificate to 5 winners! Please leave a comment on the Altenew Card Blog and/or each designer’s blog post on the blog hop list below by 05/28/2022 for a chance to win. 

Altenew will draw 7 random winners from the comments left on each stop of this blog hop and announce the winners on the Altenew Winners Page on 05/30/2022.

 
adding pinterest script 3. Changing the Position of the Pin it! button The cool thing about this code is that you have some freedom over where the Pinterest button for Blogger will go over the image. Take a look at the code that you just copied and pasted into the HTML for the word 'center'.